| Jean | |
|---|---|
 Jean in uniform
| |
|
VIZ Media name |
Jean[1] (en-us |
|
Variant |
Jean[2][3][4] (de |
|
Original name |
ジーン[11] Jīn |
|
Rank No. |
|
|
Current status |
Manga: dies realigning Clare in Pieta |
|
Ties |
Organization |
|
Ability |
|
|
Technique |
旋空剣[15] Senkū Ken |
|
Quote |
Thank you Clare...I'm glad I met you.[16] |
|
Anime voice |
Tanya Kahana (de), |
|
First appearance |
|

Etymology[]
ジーン transliterates from "Jean." From the medieval English and Scottish Jehanne, the Old French feminine form of Iohannes, deriving from the Hebrew יוֹחָנָן (Yochanan "YHWH is gracious").
Possibly alluding to Jeanne d'Arc (Joan of Arc).
Appearance[]
Claymore warrior[]
Physical[]
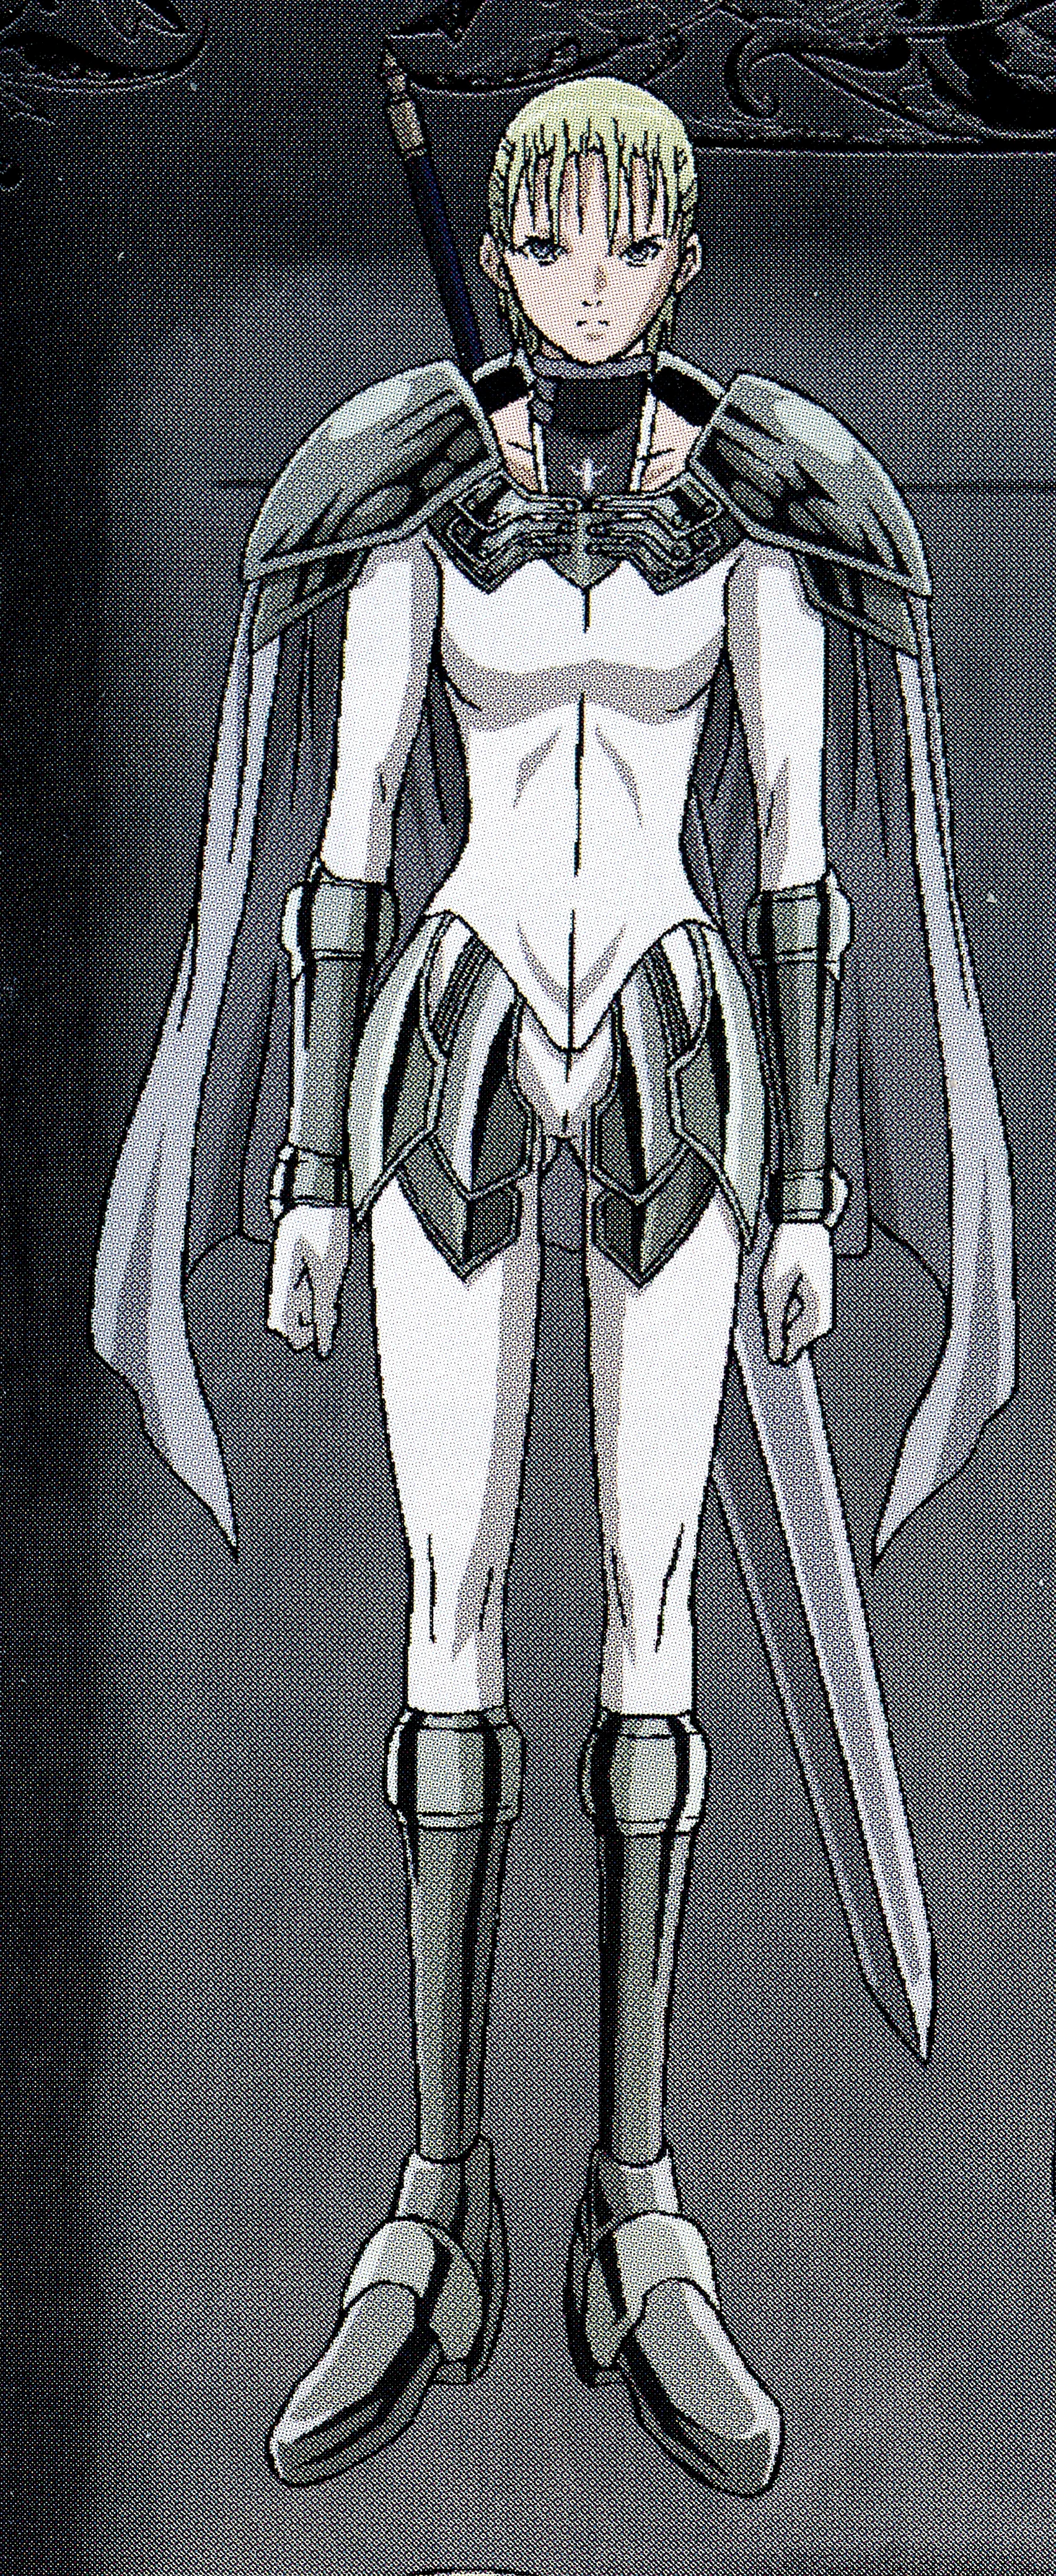
In keeping with late 20th century film depictions[17][18] of the 15th century historic figure, Jean wears a medium-length, blonde bob with a feathered fringe. Has intense, brow-less eyes in the manga, but short slanting brows in the anime.
Never shown smiling in the manga, but smiles once in the anime after the warriors kill the Insectile awakened.
Uniform[]
Jean wears a Current Generation uniform. A ribcage-like buckle holds 2-layer spaulders on the shoulders and a heavily built sword carrier at the top of the spine. Horizontally overlapped faulds hang in front of the thighs, instead of the usual position on the hips.

Jean's equipment
Vambraces cover the entire forearm, while chausses protect the lower leg up to the knee.[19]
Awakened[]
Awakens into a surreal butterfly form, with heavily veined wings. Filaments extend in all directions. Anime version is simplified, but displays florescent colors shading toward green.[20]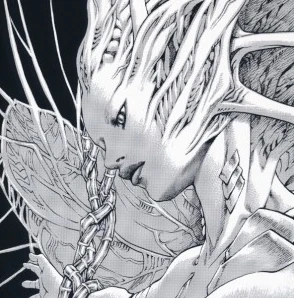
Jean awakened
Personality[]
Mental baseline (A+) enables displays of extraordinary willpower under duress. Jean survives torture and reverts to human form after awakening. Loyalty and good manners are earmarks of her personality.
In Chaldean Numerology, the number 9, Jean's number, is often viewed as the number of the saint.
Datasheet[]
Baseline[]
Height: 175cm (5ft 8.89in).[21] Dominant arm: right[22]
|
|
Class[]
Jean is an offensive type[23] warrior, her ability being Rotary Attack.[24]
Technique[]
Rotary Attack enables Drill Sword.[25]
Organization assessment[]
Organization notes high mental baseline, which enabled resisting torture and awakening by Riful. Also, enables ability to twist arm and use technique that exploits rotation. Plus thrust power at high speed, despite heavy burden on arm. Loyal companion.[26]
History[]
Early life unknown.
Zakol hunt[]
Hamel[]
In village of Hamel, Jean leads an awakened hunt to the Zakol Mountains. She detects a Yoma aura emanating from the inn, where Clare is hiding. But Jean ignores it and says it is her imagination.[27]

Zakol hunt in Hamel
Witch's Maw[]
The hunt enters an abandoned castle, where all but one warrior are captured. Later, the wounded escapee staggers into Hamel. She asks Clare to save her comrades, before dying.[28]
Back in the castle, Riful of the West supervises her consort, Dauf, in awakening Jean and Katea. The manga Raquel lies dead in corner. Dauf senses Clare's arrival. Riful orders him to deal with Clare.[29]
Round I[]
Upstairs, Clare destroys Yoma pack.[30] Dauf bursts through floor. Clare attacks Dauf, who captures her. Then Galatea arrives.[31]
Round II[]
Using Yoma Energy Alignment and Control, Galatea makes Dauf drop Clare into her waiting arms.[32] Galatea tries to leave. But Dauf caves-in entrance. But all his rods miss their target. Galatea cuts off Dauf's hand.[33]
Riful appears and couches Dauf on circumventing Galatea's technique.[34]
During battle, Riful explains she needs the warriors to awaken, so they can join her army. The enemy is Isley of the North. Riful inadvertently reveals Priscilla's existence.[35] When Clare demands to know Priscilla's whereabouts, Riful promises to tell if Clare can land one sword blow on her. Riful almost tricks Clare into awakening, but Galatea reverts her back.[36]
To break the stalemate, Galatea orders Clare to retrieve Jean, while she holds off Dauf.[37]
Round III[]
Clare discovers Jean awakened into butterfly form. Clare uses Galatea's technique to realign Jean to normal.[38]

Jean awakened
Upstairs, Galatea is exhausted, but Clare and Jean arrive in time. Galatea and Clare distract Dauf, while Jean, using Drill Sword, bores through his throat. But Dauf slams Galatea and Clare together, then strikes down Jean, but loses most of his fingers.[39]
Round IV[]
Clare asks Jean to try once more. This time, Clare's Quicksword prevents Dauf from slamming his arms together on warriors.[40]
Jean bores through Dauf's throat. But Riful stops Jean from beheading Dauf. Riful addresses Galatea and Clare: "You held me off and didn't break, despite my efforts." Then she rewards Galatea and Clare by giving back Jean.[41]
One manga translation has Riful speaking to Dauf instead: "Someone like you who can accept me without breaking." Translation repeated in English dub of anime.[42]
After Riful leaves, Galatea tries to bring Clare back to the Organization, but Jean blocks her. Instead, Galatea says she will report them dead.[43]
Later, to Clare's annoyance, Jean follows her through the forest. They run into Rubel and Rafaela. Clare is forced to join the Organization's battle group in Pieta.[44]
Battle of the North[]
Member of the battle group in Pieta during the Battle of the North. Assigned to lead Team Jean: Eliza (No. 17), Emilia (No. 27), Natalia (No. 37) and Deana (No. 44).[45]
Engagement I[]
During first engagement, the Insectile awakened decimates Team Jean, Jean standing alone.[46] Team Veronica reinforces Team Jean.[47] Veronica and Cynthia act as decoys. Helen immobilizes Insectile's legs, enabling Jean to use Drill Sword. Veronica and Cynthia chop up Insectile's legless torso.[48]
Later, Flora tests Clare's sword fighting abilities to see if Clare can replace Flora as team leader.[49] Anime version has Jean preventing fight.[50]
Engagement II[]
Manga and anime diverge here.
Manga[]
Jean appears in Yuma's flashback. In the banquet hall of the Eastern Inn, Miria holds a meeting with the battle group. She tells everyone to take a half dose of suppressant. If rendered unconscious during combat, a warrior will radiate no aura, making her appear dead to both the Northern Army and Organization.[51]
The Northern Army invades Pieta. Team Jean kills the Tyrannosaur awakened, Jean using her Drill Sword to destroy him.[52]
After losing three awakened, versus five Claymore warriors, Rigaldo decides to decapitate the battle group leadership.
Rigaldo awakens into the Silver Lion. He kills Veronica and Undine, then wounds Jean. Clare awakens and attacks. But Rigaldo repels Clare and kills Flora.[53]
He wounds Deneve. Clare further awakens. Rigaldo finally captures Miria. But Clare cuts off his arm.[54] As Clare and Rigaldo fight, Helen rescues Miria and destroys Rigaldo's arm. Clare eventually kills Rigaldo.[55]
Clare's awakening out of control, she demands that Helen kill her, but Jean intervenes and dies realigning Clare to normal.[56]
Anime[]
The Northern Army invades Pieta. Team Jean kills Tyrannosaur, Jean using her Drill Sword. Jean wears Clarice's symbol in scene.[57]
Northern Army retreats. Rigaldo sequence similar to manga.[58]
Raki races to town, followed by Priscilla. Priscilla awakens and Clare gives chase. Miria, Deneve and Helen follow. In the snowy landscape they meet Galatea, who points them toward the volcano, where Clare and Priscilla fight.
Meanwhile back in Pieta, Jean finds Raki crying in an alleyway. After speaking with Jean, Raki decides to accompany her as she sets out to find Clare.[59]

Last of Jean
In the volcano, Priscilla defeats Clare. Then, Priscilla fights and defeats Miria, Deneve and Helen.[60] Jean and Raki arrive. Clare returns to fight and defeats Priscilla. Raki stops Clare from executing Priscilla. Jean dies realigning Clare to normal.[61]
Witch's Maw II[]
Jean makes a last "appearance." In an abandoned castle, Witch's Maw II, Clare enters the mind of Luciela x Rafaela. Clare enters a dream world, where she and Jean meet Rafaela in a replay from Scene 50.[62] Rafaela asks which one is Clare. Clare tries to protect Jean. But when Clare reaches out, Jean is gone.[63]
References[]
Tankōbon Claymore volumes cited are VIZ Media (en-us) editions, unless otherwise noted. Manga scenes (chapters) not yet translated cite Shueisha tankōbon (ja) editions. Manga scenes not yet published in tankōbon form cite Jump SQ (ja) editions. Fragments of Silver Omnibus (総集編 銀の断章 Gin no Danshou) 1–3, Shueisha, are only available in Japanese. Anime scenes (episodes) cited are FUNimation (en-us) editions, unless otherwise noted.
- ↑ Claymore 9, Scene 46, p. 20
- ↑ Claymore 9, Tokyopop, Scene 46, p. 20
- ↑ Claymore 9, Ediciones Glénat España, Scene 46, p. 20
- ↑ Claymore 9, Star Comics, Scene 46, p. 16
- ↑ Claymore 9, Glénat Édition Française, Scene 46, p. 20
- ↑ Claymore, Kazé Anime, Anime Scene 18
- ↑ Claymore 9, Daewon CI, Scene 46, p. 20
- ↑ Claymore 9, Comix-ART, Scene 46, p. 20
- ↑ Claymore 9, Culturecom, Scene 46, p. 20
- ↑ Claymore 9, Ever Glory, Scene 46, p. 20
- ↑ Claymore 9, Shuisha, Scene 46, p. 20
- ↑ Fragments of Silver Omnibus 3, "Yoma War Record III," p. 724
- ↑ Fragments of Silver Omnibus 3, "Yoma War Record III," p. 724
- ↑ Fragments of Silver Omnibus 3, "Yoma War Record III," p. 724
- ↑ Fragments of Silver 3, "Yoma War Record III," p. 724
- ↑ Claymore 11, Scene 60, p. 85
- ↑ Saint Joan (1957)
- ↑ The Trial of Joan of Arc (1962)
- ↑ Claymore "Master Book Sequence 4," avex, p. 4
- ↑ Claymore 9, Scene 46, pp. 30–31; Claymore, Anime Scene 16
- ↑ Fragments of Silver Omnibus 3, "Yoma War Record III," p. 724
- ↑ Fragments of Silver Omnibus 3, "Yoma War Record III," p. 724
- ↑ Fragments of Silver Omnibus 3, "Yoma War Record III," p. 724
- ↑ Fragments of Silver Omnibus 3, "Yoma War Record III," p. 724
- ↑ Fragments of Silver Omnibus 3, "Yoma War Record III," p. 724
- ↑ Fragments of Silver Omnibus 3,"Yoma War Record III," p. 724
- ↑ Claymore 8, Scene 41, p. 51; Claymore, Anime Scene 15
- ↑ Claymore 8, Scene 41, pp. 61–67; Claymore, Anime Scene 15
- ↑ Claymore 8, Scene 42, p. 100; Claymore, Anime Scene 16
- ↑ Claymore 8, Scene 43, pp. 106–108; Claymore, Anime Scene 16
- ↑ Claymore 8, Scene 43, p. 132; Claymore, Anime Scene 16
- ↑ Claymore 8, Scene 44, p. 136; Claymore, Anime Scene 16
- ↑ Claymore 8, Scene 44, p. 155; Claymore, Anime Scene 16
- ↑ Claymore 8, Scene 45, pp. 159–160; Claymore, Anime Scene 16
- ↑ Claymore 8, Scene 45, p. 187; Claymore, Anime Scene 16
- ↑ Claymore 9, Scene 46, pp. 7–18; Claymore, Anime Scene 16
- ↑ Claymore 9, Scene 46, pp. 21–22; Claymore, Anime Scene 16
- ↑ Claymore 9, Scene 46, pp. 30–32; Claymore, Anime Scene 16
- ↑ Claymore 9, Scene 47, p. 61; Claymore, Anime Scene 17
- ↑ Claymore 9, Scene 48, pp. 88–89; Claymore, Anime Scene 17
- ↑ Claymore 9, Scene 49, p. 110; Claymore, Anime Scene 17
- ↑ Claymore, Anime Scene 17
- ↑ Claymore 9, Scene 49, pp. 121–122; Claymore, Anime Scene 17
- ↑ Claymore 9, Scene 50, pp. 131–142; Claymore, Anime Scene 18
- ↑ Claymore 9, Scene 51, pp. 169–173; Claymore, Anime Scene 18
- ↑ Claymore 10, Scene 52, p. 34
- ↑ Claymore 10, Scene 53, p. 36; Claymore, Anime Scene 19
- ↑ Claymore 10, Scene 53, pp. 59–67; Claymore, Anime Scene 19
- ↑ Claymore 10, Scene 55, p. 108
- ↑ Claymore, Anime Scene 20
- ↑ Claymore 12, Scene 66, pp. 83–87
- ↑ Claymore 10, Scene 57, p. 164
- ↑ Claymore 10, Scene 57, p. 184
- ↑ Claymore 11, Scene 58, pp. 34–35
- ↑ Claymore 11, Scene 59, pp. 68–69
- ↑ Claymore 11, Scene 60, pp. 78–87
- ↑ Claymore, Anime Scene 21
- ↑ Claymore, Anime Scene 23
- ↑ Claymore, Anime Scene 24
- ↑ Claymore, Anime Scene 25
- ↑ Claymore, Anime Scene 26
- ↑ Claymore 9, Scene 50, pp. 136–137
- ↑ Claymore 17, Scene 92, pp. 65–67