| Father Vincent | |
|---|---|
 Father Vincent | |
|
VIZ Media name |
Father Vincent[1] (en-us |
|
Variant |
Pater Vincent[2] (de |
|
Original name |
ヴィンセント司祭[10] Vuinsento Shisai |
|
Rank |
Priest |
|
Current status |
Alive |
|
Ties |
Church of Rabona |
|
Duties |
In charge of Rabona Cathedral |
|
Quote |
But please forget about dying.[11] |
|
Anime voice |
Rainer Doering (de), |
|
First appearance |
|
Etymology[]
ヴィンセント transliterates from "Vincent," from the Latin vincere (to conquer).
"Vincent" is the name of numerous saints. Also the name of the Dutch Post-Impressionist painter, Vincent van Gogh (1853–1890).
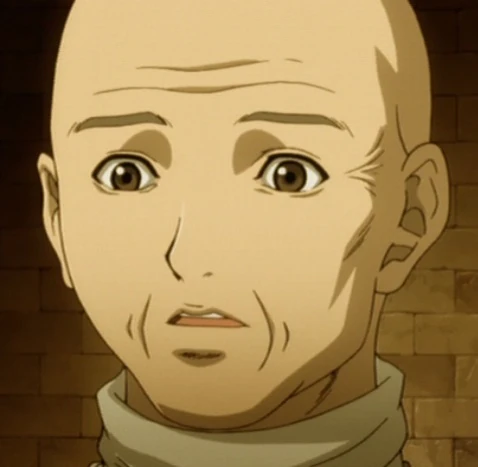
Appearance[]
Oval face. Bald or shaven head. 50ish. Appears either the same or slightly taller[12] than Clare—170cm (5ft 6.92in).[13] Father Vincent wears a purple robe in the anime.
Studio profiles of Father Vincent
Personality[]
Cheerful, grateful persona. Accepts Clare and her comrades, despite the Holy City of Rabona prohibiting Claymore warriors. In charge of the main cathedral in the city. Worked to repeal the city ordinance against Claymore warriors.[14]
History[]
Early life unknown. A priest of the Church of Rabona.
Covert operation[]
Anime cold open[]
In the cold open of the anime, a priest enters a cathedral chamber. The bloodied body of Father Van lies on the altar steps. The priest faints and then screams.
Later, Father Vincent has an emergency meeting with Fathers Pario and Serene, where Vincent announces his decision to hire a Claymore.[15] These scenes are absent in the manga.
Manga cold open[]
In the cold open of the manga, Clare checks in at a local inn. She poses as an art dealer traveling with her younger brother, Raki.
In a flashback, Rubel has a campfire meeting with Clare. A request came from Rabona. But since Rabona bans anything "unnatural," including Claymore warriors, Clare has to take suppressant to change her silver eyes to a "normal" color.[16]
First meeting[]
After checking in at the inn, Clare and Raki visit Rabona Cathedral. She contacts Vincent in the baptismal chamber. She introduces herself with a prearranged codeword. He requests that they meet later that night in the church tower.[17]
Galk and Sid[]
Interference[]
After dinner, Clare leaps amid rooftops of city. She meets Vincent in a cathedral tower room. He explains how priests are being murdered. Before leaving, she asks him to take care of Raki should she be killed. He consents, embarrassed that he should be so afraid, yet Clare being more concerned about a boy's life than her own.[18]

Meeting in the tower
Amid the rooftops of the city, Galk and Sid attack Clare, who is returning to the inn. Sid throws three knives, which Clare catches and throws back. Clare escapes.[19] Later that night, two guards in the cathedral are killed by the Yoma.[20]
Interrogation[]
The next morning, Raki wakes up and notices that Clare's eyes are silver again. She takes her suppressant in time. City guards, lead by Galk and Sid, barge into room. They question Clare's whereabouts last night. Sid suspects Clare is a Claymore and somehow changed her eye color. But Raki distracts Sid with melodramatics.[21]
Later in the baptismal room, Clare again confers with Vincent. She suspects a "Voracious Eater" is the culprit.[22]
Second night trip[]
Leaping among the rooftops, Clare heads for cathedral. Galk and Sid intercept her again. While deflecting their attacks, another victim screams. Clare races inside the cathedral, where the victim lies dead.[23]
The Yoma attacks from behind, Clare dodging. Galk and Sid arrive and the Yoma turns on them. Clare saves both from fatal attacks, but is impaled by the Yoma's extensible claws. She is left unconscious.[24]
Despite Sid's protests, Galk brings Clare to Vincent's bedroom,[25] where she remains comatose. With Raki at her bedside, she regains consciousness after a 2-day coma.[26]
Yoma[]
Examining the suspects[]
Cathedral staff have surprise meeting. Despite Father Rodo's protests, Clare, not fully recovered from her injuries, exams each suspect—including Bishop Kamuri and even Vincent—but everyone proves human. Yet all have a Yoma scent.[27] The situation turns ugly as Rodo verbally attacks Vincent.
Clare finally reaches the last possibility. If Yoma can impersonate the living, what if one impersonates the dead?[28]
Second Yoma fight[]
In the baptismal room, Raki paces about, still carrying the statue. A "mummy" rises from a coffin and morphs into a Yoma. Meanwhile, Clare is racing to the baptismal room.[29]
During the ensuing fight, she bisects the Yoma in two. On a later day, Vincent, Galk and Sid thank Clare and Raki when they leave the city.[30]
7-Year timeskip[]
Sister Latea[]
Rabona becomes more tolerant, though Claymores are still forbidden.[31] After Galatea deserts the Organization, she moves to Rabona and becomes a nun.[32]
Agatha[]
Sending for help[]
When Galatea detects an Awakened being in the city, she lures a purge team from the Organization by releasing her Yoma Energy. Clarice and Miata are sent.[33]
During the bungled execution attempt, Agatha attacks the city.[34] Galatea ends up fighting both warriors and Agatha, as Agatha destroys the city.[35] 3-way fight ends with Galatea, Clarice and Miata defeated.[36]
Surprise visitors[]
The seven Ghosts appear on the rooftops—Miria, Deneve, Helen, Cynthia, Tabitha, Yuma and Clare.[37] Clare announces the impeding death of Agatha. The engagement ends with the rescue of Galatea and the death of Agatha.[38]
Aftermath[]
Miria puts Galatea in charge of Clarice and Miata. Later, Miria negotiates with Vincent in the cathedral, regarding Claymore status in the city.[39]
Later, Galatea speaks with Vincent about the stigma on Claymore warriors bodies. "That's the proof of us being half-human, half-Yoma. Because it shows that something resides in this body which should be avoided."[40]
References[]
Tankōbon Claymore volumes cited are VIZ Media (en-us) editions, unless otherwise noted. Manga scenes (chapters) not yet translated cite Shueisha tankōbon (ja) editions. Manga scenes not yet published in tankōbon form cite Jump SQ (ja) editions. Fragments of Silver Omnibus (総集編 銀の断章 Gin no Danshou) 1–3, Shueisha, are only available in Japanese. Anime scenes (episodes) cited are FUNimation (en-us) editions, unless otherwise noted.
- ↑ Claymore 2, Scene 5, p. 23
- ↑ Claymore 2, Tokyopop, Scene 5, p. 23
- ↑ Claymore 2, Ediciones Glénat España, Scene 5, p. 23
- ↑ Claymore, Yamato Video, Anime Scene 3
- ↑ Claymore 2, Star Comics, Scene 5, p. 21
- ↑ Claymore 2, Daewon CI, Scene 5, p. 23
- ↑ Claymore 2, Comix-ART, Scene 5, p. 23
- ↑ Claymore 2, Culturecom, Scene 5, p. 23
- ↑ Claymore 2, Ever Glory, Scene 5, p. 23
- ↑ Claymore 2, Shueisha, Scene 5, p. 23
- ↑ Claymore 2, Scene 5, p. 37
- ↑ Claymore 2, Scene 8, p. 142
- ↑ Fragments of Silver Omnibus 1, "Yoma War Record I," p. 506
- ↑ Claymore 14, Scene 73, p. 17
- ↑ Claymore, Anime Scene 3
- ↑ Claymore 2, Scene 5, p. 15; Claymore, Anime Scene 3
- ↑ Claymore 2, Scene 5, p. 25; Claymore, Anime Scene 3
- ↑ Claymore 2, Scene 5, pp. 35–36; Claymore, Anime Scene 3
- ↑ Claymore 2, Scene 5, pp. 38–43; Claymore, Anime Scene 3
- ↑ Claymore 2, Scene 6, pp. 47–50; Claymore, Anime Scene 3
- ↑ Claymore 2, Scene 6, pp. 54–58; Claymore, Anime Scene 3
- ↑ Claymore 2, Scene 6, p. 62; Claymore, Anime Scene 3
- ↑ Claymore 2, Scene 6, p. 68–81; Claymore, Anime Scene 3
- ↑ Claymore 2, Scene 7, pp. 92–97; Claymore, Anime Scene 3
- ↑ Claymore 2, Scene 7, p. 104; Claymore, Anime Scene 4
- ↑ Claymore 2, Scene 7, p. 119; Claymore, Anime Scene 4
- ↑ Claymore 2, Scene 8, pp. 129–143; Claymore, Anime Scene 4
- ↑ Claymore 2, Scene 8, p. 146; Claymore, Anime Scene 4
- ↑ Claymore 2, Scene 8, pp. 150–153; Claymore, Anime Scene 4
- ↑ Claymore 3, Scene 10, pp. 63–68; Claymore, Anime Scene 4
- ↑ Claymore 14, Scene 73, p. 17
- ↑ Claymore 14, Scene 73, p. 21
- ↑ Claymore 14, Scene 73, p. 63
- ↑ Claymore 14, Scene 75, pp. 42–43
- ↑ Claymore 14, Scene 75, pp. 65–66
- ↑ Claymore 14, Scene 77, p. 122
- ↑ Claymore 14, Scene 77, pp. 126–127
- ↑ Claymore 15, Scene 78, pp. 9–37
- ↑ Claymore 15, Scene 80, p. 80
- ↑ Claymore 15, Scene 82, pp. 148–149