| Raki | |
|---|---|
 Raki from anime | |
|
VIZ Media name |
Raki[1] |
|
Variant |
Raki[2][3][4][5] (de |
|
Original name |
ラキ[10] Raki |
|
Current status |
Alive |
|
Ties |
Clare, Isley, Priscilla |
|
Technique |
|
|
Quote |
You're just like an ordinary girl.[13] |
|
Anime voice |
Dirk Stollberg (de), |
|
First appearance |
|
Etymology[]
The original Japanese name, ラキ, is a variant of ラッキー Rakkī, a transliteration of "Lucky," an English first or nickname. Puns and allusions—based on "luck" or "lucky"—go untranslated, due to the use of "Raki" in most translations. Much irony in the name.
The apocryphal etymology of "Raki" as deriving from the plural noun raki,[14] ![]() Polish for "crayfishes," originated as a pun on the Animesuki Claymore forum.[15] Often treated seriously on reference websites.
Polish for "crayfishes," originated as a pun on the Animesuki Claymore forum.[15] Often treated seriously on reference websites.
Appearance[]
Youth[]
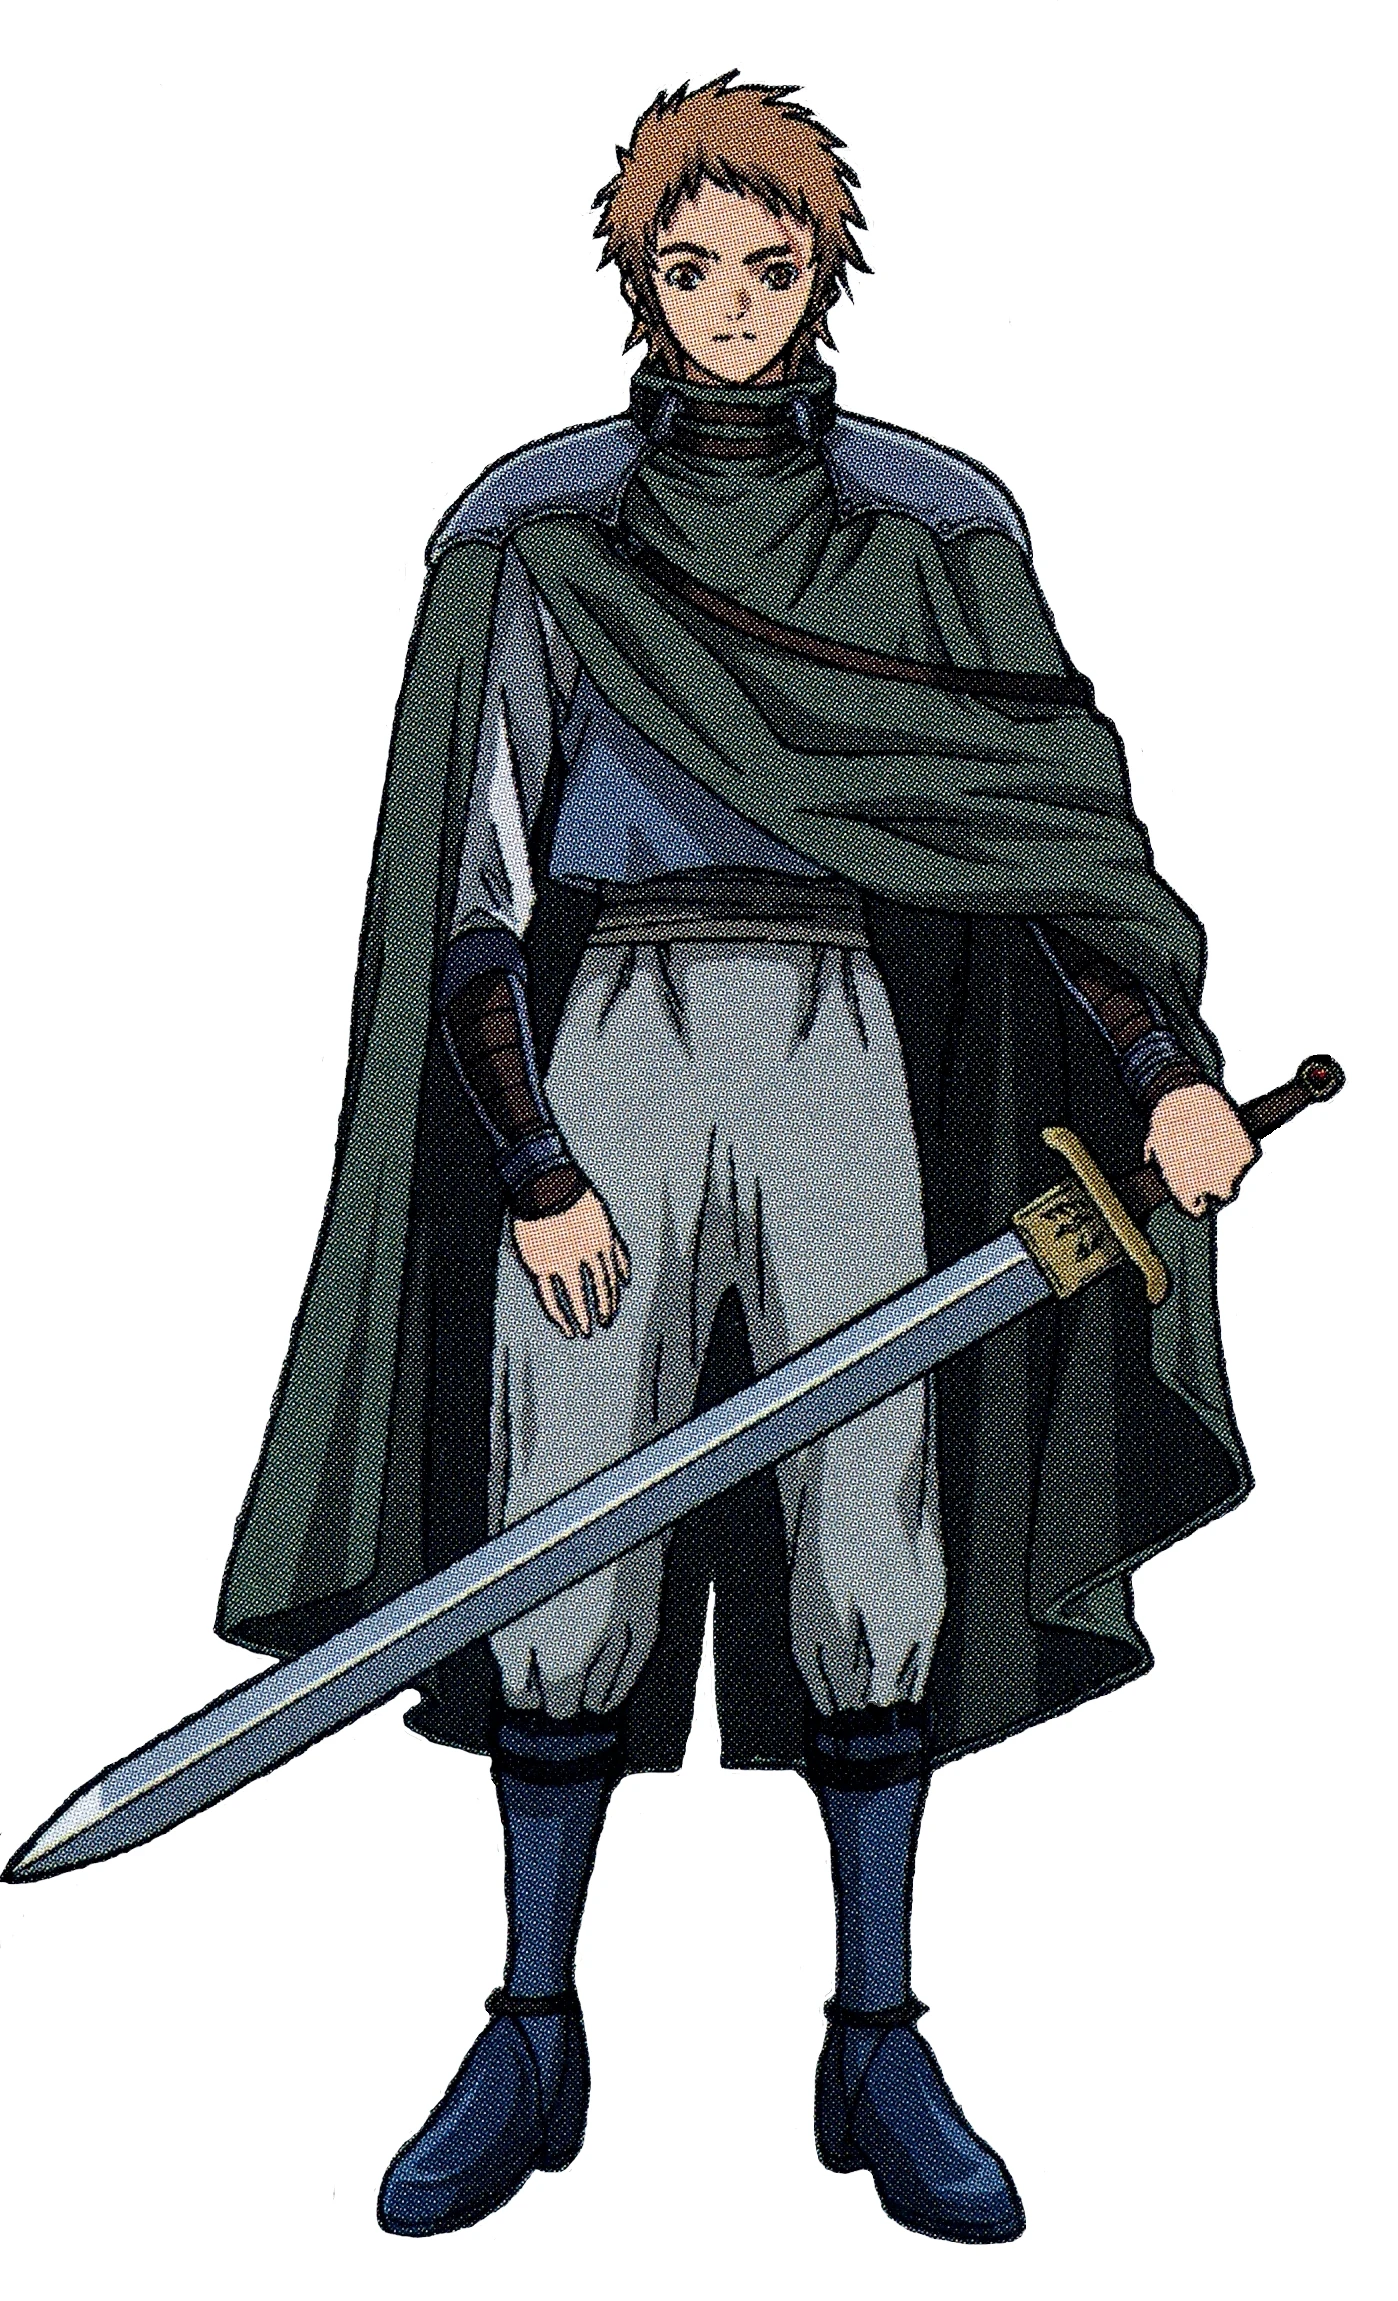
A preadolescence male in Scenes 001–063, with disheveled hair and a scar beside his left eye. In the anime, his eyes appear bnown. His early dress includes tank-top, harem pants and puttees.
The young Raki resembles "Leo Halford"[16] of Norihiro Yagi's earlier series, Angel Densetsu, in both appearance and personality.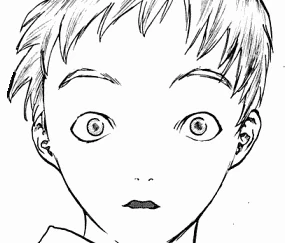
Leo Halford
Adult[]
After the 7-year timeskip, Raki reappears in Doga with Priscilla.[17] Over a tall and well-muscled body, he wears armor that are possibly remnants from the Initial Male Era of Claymore warriors.[18] The ensemble consists of 5-layer spaulders on the shoulders and 3-layer faulds on the hips. Raki usually wears a cowl over the armor.[19]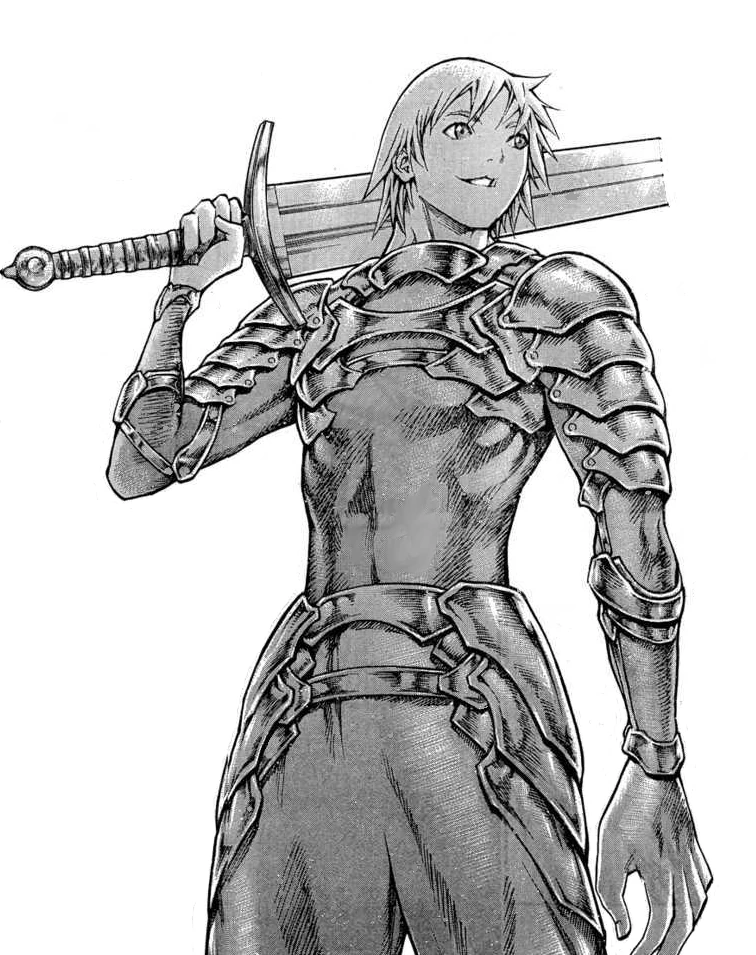
Raki in armor
After escaping prison at Organization Headquarters, he wears a brown vest, breeches and boots. In color manga illustrations, his eyes are depicted as blue.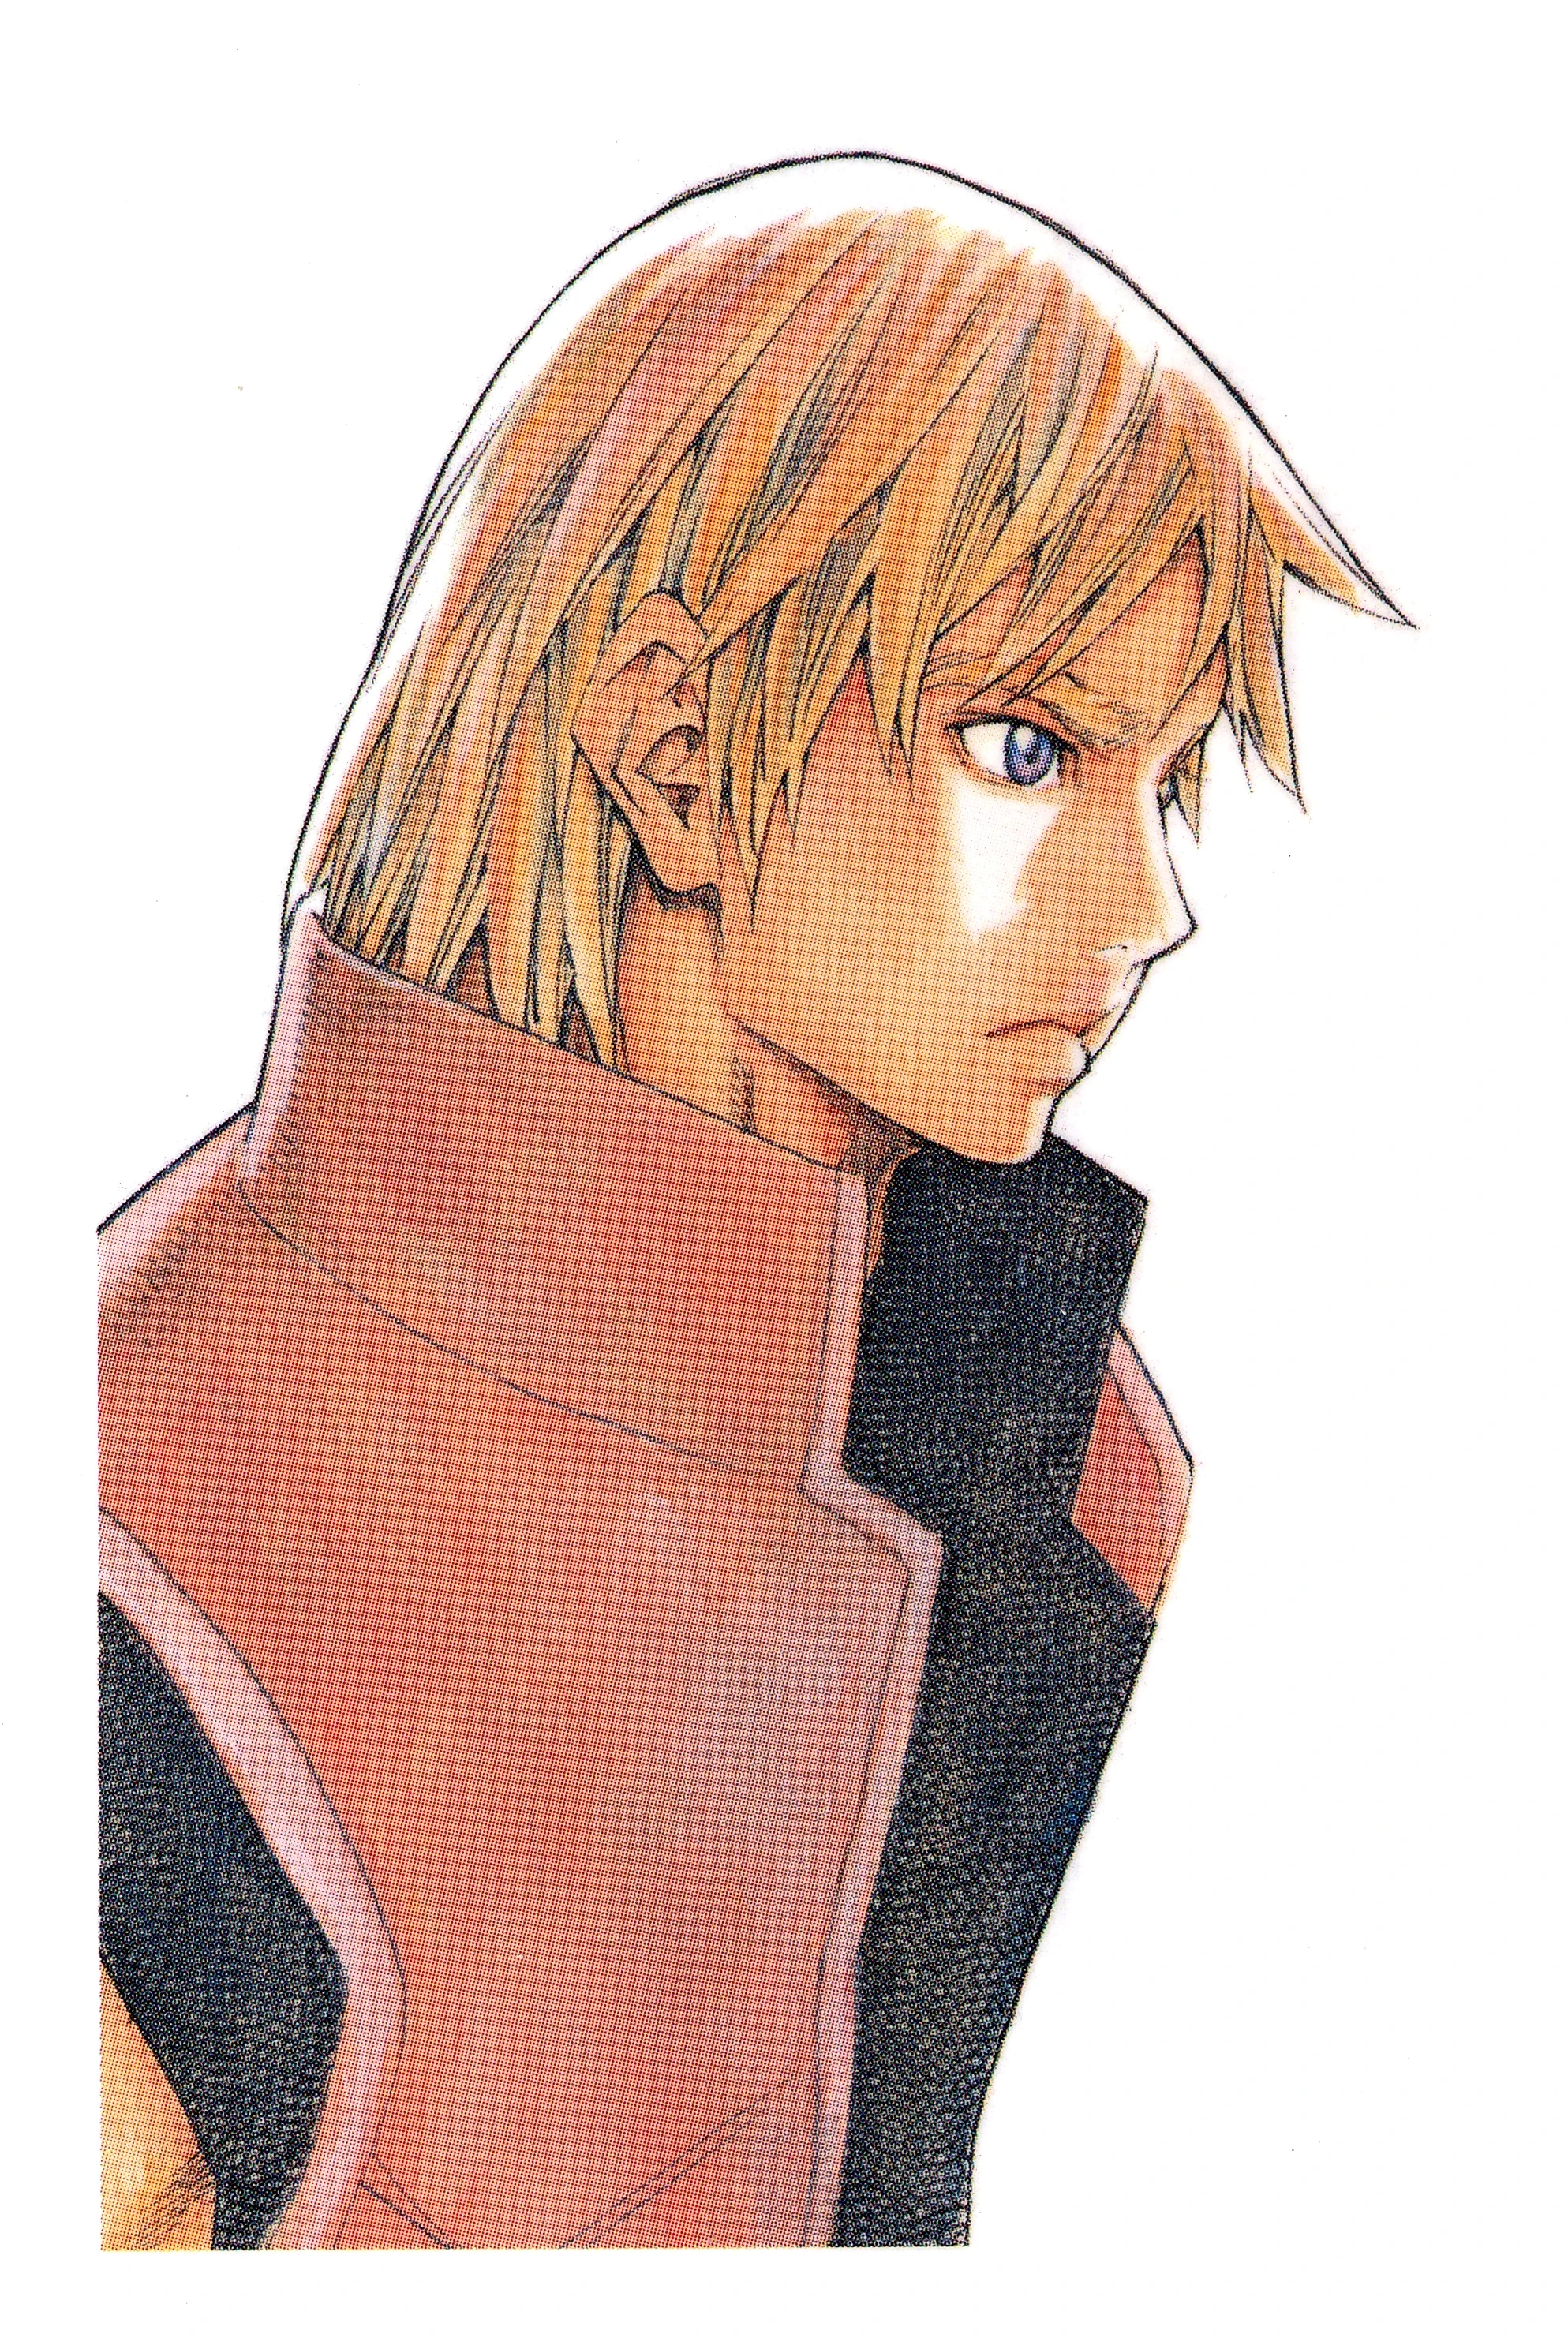
Raki without armor
Personality[]
Extroverted. Opposite of the introverted personality of Clare. Raki is trusting, uncynical. The eternal optimist. His relationship with Clare repeats Leo Halford's relation with "Ikuno Shiratakiyagi",[20] a Clare-like character in Angel Densetsu. Both Raki and Leo want to protect their older female mentors.[21][22]
Datasheet[]
Technique[]
Cooking[]
The Organization notes that Raki's "specialty" is cooking.[23] Later out of compassion, Clare allows the orphaned Raki to accompany her as her personal cook until she finds a permanent home for him.[24]
Sword[]
Before the 7-year timeskip, Raki displays no unique abilities. After being given a sword from Galk[25] and promising Sid to protect Clare, Raki begins his journey on swordsmanship. Raki possesses above average stamina and pain tolerance for a boy of his age and stature as evident from battle with Ophelia.[26]
After the timeskip he shows knowledge and skill of a master swordsman passed on from his mentor Isley. Raki is skillful and powerful enough to kill an average Yoma while sustaining no injures. He is able to hold his own with the Twin Trainees.
Organization assessment[]
Owing to a family member being infected with Yoma, the boy was exiled from his village. Clare allowed him to accompany her due to seeing her former self in him. The Organization recognizes the improvement of Clare's mental state as a result. Thereby the responsibility of the boy's treatment is that of the officer in charge (Rubel).[27]
History[]
Clare[]
Silver-eyed Slayer arc[]
Doga mission[]
In the village of Doga, a meeting is held at the chief's house. The chief hired a Claymore to rid the village of a Yoma. A young man, Zaki, leaves the meeting and is greeted by his younger brother, Raki.
<a href="./File:Claymore_Raki_meets_Clare">  </a>
</a>
Raki meets Clare
But instead of going home with Zaki, Raki rushes to see the "Claymore." He tries to follow Clare, who nearly decapitates him, due to the Yoma scent he carries from Zaki.[28] When Raki arrives home, he finds his uncle's body. The awakened Zaki reveals himself and is about to eat Raki when Clare bursts through the ceiling and bisects Zaki.[29]
Egon mission[]
Raki is exiled from Doga after the death of Zaki. He is dumped in the desert. He wanders about in a sandstorm, then collapses. The silhouette of a Claymore warrior watches.[30]
Raki awakes at an inn. The innkeeper tells him that a Claymore brought him to Egon village. Raki searches the village for the Claymore. A stranger tells him that a Claymore is looking for him.[31]
In the wooded outskirts of Egon, Raki meets a Yoma wearing a Claymore uniform. When the Yoma takes Raki hostage, Clare rescues him and kills the Yoma.[32] Remembering her own situation as a child, she allows Raki to accompany her as a "cook." In the anime, she also reveals her name.[33]
Strah mission[]
In the manga, Clare rescues Raki after her assignment in Strah. In the anime, Raki accompanies Clare at Strah.[34]
Shire mission[]
At a nighttime meeting oasis, Rubel rendezvous with Clare. He warns her not to become too attached to Raki, as he suspects Raki reminds Clare of her past. He gives her a black card from Elena and assigns her to the Shire mission.[35] Clare rendezvous with Elena amid the ruins of Mount Shire, where Clare euthanizes her friend, despite Raki's protests.[36]
Darkness in Paradise arc[]
Clare is sent on a covert operation to the Holy City of Rabona, on request from Father Vincent. Raki pretends to be her younger brother to enhance Clare's disguise as an art dealer.[37] Her mission is to find and kill a Yoma that has appeared in Rabona.[38]
The killings are taking place inside the cathedral. The Yoma responsible nearly kills Clare.[39] When she recovers, she examines church members, while the Yoma, pretending to be a saint's corpse, threatens Raki downstairs. Clare, with the help of Galk and Sid, kills Yoma.[40] But when Clare awakens, Raki inadvertently reverts her back to normal.[41]
In the anime, Galk gives Raki a Rabona sword as a farewell present.[42]
Awakened hunts[]
Paburo hunt[]
Clare forces Paburo hunt to wait a week. The hunt captain, Miria, is already hostile, due to Clare's previous behavior in Toriro.[43] Helen teases Clare for bringing Raki, as well as her low rank. Miria breaks up the resulting fight.[44]
Gonahl hunt[]
Ophelia[]
Clare meets Ophelia, leader of Gonahl hunt. Ophelia discovers Clare is half-awakened. She seizes Clare.[45]
Raki's attack frees Clare. Clare warns Ophelia that by killing Raki, Ophelia will forfeit her life. But Ophelia replies only if there are living witnesses, which she does not intend on leaving.[46]
Ophelia cuts off Clare's legs. She challenges Clare to reattach them as she fights Raki in a sword match. With each passing minute, Ophelia increase her skill level, intending to do so until either Raki is killed, or Clare manages to reattach her legs and rescue him.[47]
Visitor[]
But a young girl appears. She morphs into the Former Single-digit awakened being.[48]
Clare reattaches her legs, but Ophelia throws Raki to the awakened being. She holds Clare face-down as Raki is about to be eaten. Clare awakens and escapes Ophelia's control. Then she rescues Raki.[49]
While Ophelia is preoccupied with the awakened being, Clare flees with Raki.[50]
Kiss[]
Clare senses Ophelia's victory over the awakened being. With little time left, she orders Raki to flee in the opposite direction, while she holds off Ophelia.[51]
<a href="./File:Claymore_Raki">  </a>
</a>
Clare's farewell
Raki protests, wanting to stay with Clare. But she gives him a "shut-up kiss," saying three things: be quiet, that she cares for him, and farewell.[52] She promises to stay alive and search for him. Finally, he relents and flees.[53]
Battle of the North[]
During the Battle of the North, Raki reappears after separating from Clare in Scene 34.
Manga version[]
Raki wanders through the ruins of an Alfons village. He escaped from slave prison.[54]
He spots a young girl about to be hit by falling debris. He pushes her out of the way. She clings to him.[55]
Isley finds them. He says the girl seldom becomes attached to anyone. He asks Raki to accompany the young girl home. Then he reveals her name—Priscilla.[56]
Later, Raki awakes, surprised Priscilla is asleep in bed with him.[57]
While Isley spars with Raki, Priscilla wanders outside. Raki finds Priscilla, as she senses the Yoma auras of the Claymore warriors going out—one-by-one.[58]
Raki later reappears with Priscilla in Mucha. They feel the ground quake as Isley battles Luciela.[59]
Anime version[]
In a ruined village, Raki searches among the grave-marks of Claymore warriors, hoping not to find Clare's symbol. Relieved that she is not buried here, he moves through the ruined village. He spots a young girl about to be hit by falling debris. He pushes her out of the way. She clings to him.[60]
<a href="./File:Claymore_Raki_meets_Priscilla">  </a>
</a>
Raki meets Priscilla
Isley finds them. He says the girl seldom becomes attached to anyone. He asks Raki to accompany the young girl home. Then he reveals her name—Priscilla.[61]
Raki accompanies Isley and Priscilla, as they camp in the winter forest.[62]
Later, Raki discovers Priscilla feeding on a dead man in a cavern. Raki almost beheads her. Isley explains to him that Priscilla is an awakened being.[63]
Isley takes Raki and Priscilla on horseback to Pieta. Refugees alert Raki to Claymore warriors fighting in Pieta.[64]
Raki races to town, followed by Priscilla. She awakens and Clare gives chase. Miria, Deneve and Helen follow. Jean finds Raki crying in alleyway. After speaking with Jean, Raki decides to accompany her as she sets out to find Clare. Priscilla and Clare battle in a volcano.[65]
After Clare's defeat, Priscilla fights and defeats Miria, Deneve and Helen.[66]
<a href="./File:Claymore_Raki_stops_beheading">  </a>
</a>
Raki stops beheading
Jean and Raki arrive. Clare returns to fight and defeats Priscilla. Raki stops Clare from executing Priscilla. Jean dies returning Clare to normal. Isley takes away Priscilla. Next day, Miria, Deneve, Helen and Clare desert Organization. Clare leaves with Raki. Series for Raki ends here.[67]
7-year timeskip[]
Doga[]
Eyes[]
The Organization's Eyes, Renée, confronts Raki in Doga. She demands to know how he detected the Yoma. When he equivocates, she grabs him by the collar. But a small child intervenes. Renée at first ignores the child, but suddenly retreats.[68]
Raki tries to reassure Renée, who cannot believe he would let the child accompany him. After Renée promises to give Clare a message and departs, Raki pats the head of Priscilla.[69]
Isley's last stand[]
Meanwhile in the southern region of Mucha, Abyss Feeders pursue Isley. In an unnamed town, he cannot regenerate his centaur legs and topples. Abyss Feeders finish him off. His last thoughts are about his "family,"—Priscilla, Raki and himself.[70]
Ticelli[]
In the village of Ticelli, Priscilla tells Raki that "something big has awakened."[71]
Destroyer begins rod barrage. Priscilla holds back Raki—a rod barely misses him.[72]
In a flashback, when Raki is hit with parasitic rods, Priscilla abandons him. A stronger source of Teresa's scent is coming from the Destroyer. In gratitude for leading her this far, she leaves Raki with her arm buried in his shoulder, which prevents the rods from absorbing the life force out of Raki.[73]
Retrieval Squad finds Raki. Dae is surprised that Raki is alive. He orders Raki to be brought back to Organization Headquarters.[74]
Sutafu[]
Executive meeting[]
Dae reveals Raki survived due to embedded arm.[75] Dae gets permission to revive an old project. Arm to be used to resurrect three dead No. 1 warriors.[76]
Rebellion[]
Breakout[]
One of the Twin Trainees breaks into Raki's prison cell.[77] She then attacks Raki with tentacles.
As other trainees watch, Raki leaps outside and grabs another trainee's sword. He deflects the Twin's attacks. Then her sister joins the attack.[78]
But he stops the fight and explains who he is. Another trainee explains they are fleeing Organization.[79]
While the Twins aid the Claymore rebels, Raki takes over the protection of trainees.[80]
Rafutera[]
Raki later rescues Rafutera from her guard escort. Raki fights off other guards as the trainees regenerate Rafutera.[81]
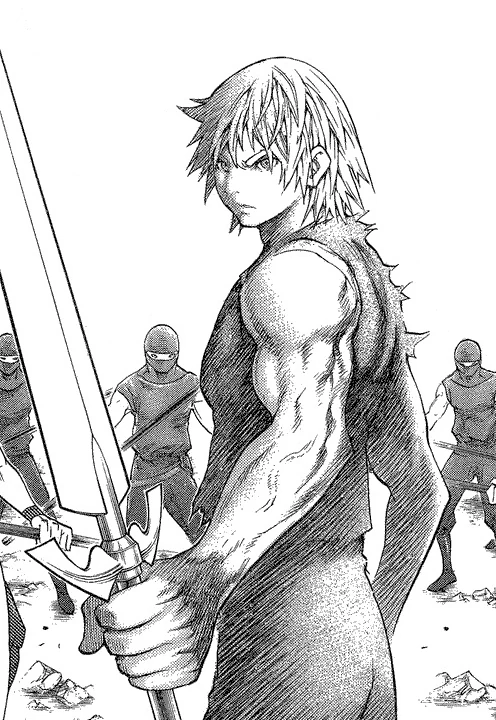
Raki in combat
Familiar faces[]
During the battle at Organization Headquarters, Deneve reassures Miria that Clare is "resting" in Rabona.[82]
Later, after attacking a Yoma Energy apparition of Priscilla, Deneve admits that Clare is trapped with Priscilla.[83]
Raki and the trainees approach the warriors. The members of the Paburo hunt recognize him. He tells the warriors that he was the boy who accompanied Clare seven years ago.[84]
Miria[]
After Deneve relates the events in Lautrec,[85] Miria now understands Clare's situation.[86]
She speculates that Cassandra, reanimated by this person's Yoma energy, is also under this person's control, and is traveling to Rabona to free this same person.[87]
Helen wants to stop Cassandra, but Miria decides otherwise. She envisions freeing both Clare and Priscilla before Cassandra's arrival.[88]
There is concern that Cassandra will detect the warriors' Yoma auras. Raki suggests everyone travel by ship around the south coast, avoiding Cassandra.[89]
Miria tells Raki to accompany them. She wants him to call out to Clare from the cocoon.[90]
Return to Rabona[]
The Ghosts and Raki return by boat. They appear atop a hill viewing the Holy City.[91]
Raki spots a young woman sitting hillside. When he suggests she accompany him and his companions to Rabona, she says the city is deserted. Deneve warns Raki away as this woman is an awakened being. Then Raki notices a dozen or so "humans" watching the city from the hills, all but two being female.[92]
Deneve says they are all awakened. Miria adds that they appear to be former single-digits with high baselines.[93]
Cocoon[]
The Ghosts and Raki visit the Yoma cocoon the next morning after arriving at the Holy City.[94]
Galatea cannot detect Clare's aura and sees little hope of pulling out Clare. But Raki approaches the cocoon, despite Galatea's warning. Deneve defends Raki's decision.
When Raki touches and talks to the cocoon, tentacles pierce his body. Galatea calls for help, but Raki says the cocoon is only probing his body. The tentacles soon withdraw.[95]
Clare exits[]
Confession[]
Tearful, Raki confesses that despite his great size and strength, Clare is still the stronger one. And that he only wishes to be at Clare's side forever.[96]
A section of the cocoon crumbles and out comes Clare.[97]
Danger[]
But Clare's internal organs are spilling out from the vertical incision running down the length of her torso. While Raki and Yuma press the incision to keep Clare's organs from emerging, Deneve quickly sews up Clare with crude stitching. She explains that the Organization never solved the problem of healing the Yoma implant incision. Sutures were used to keep the warriors whole.[98]
Friends rejoined[]
The Ghosts look on as Raki hugs a tearful Clare with all his might.[99]
Two combats[]
During the combat between the Destroyer and Priscilla, two awakeneds are thrown into Rabona. The Ghosts destroy both.
Meanwhile, atop a city battlement, Raki ponders Clare's quest for revenge. Though he understands Clare's motives, he is still puzzled by Priscilla's. Suddenly Chronos and Lars approach Raki for a talk.[100]
Chronos[]
Raki's mentor[]
Chronos notes Raki's unusual physique and matching sword technique, both designed to fight Yoma entities. Raki admits that his mentor was Isley, whom he met in the north.[101]
No. 1[]
Chronos details Isley's history as warrior No. 1 of the male era. He further speculates that Isley awakened in order to destroy the previously awakened male warriors in a series of stratagems.[102]
Isley's fate[]
Chronos says Isley died from secret weapons of the Organization. Raki suspected that Isley drew something away (Abyss Feeders), so Raki and Priscilla would be left unharmed.[103]
Last question[]
Chronos and Lars are suddenly surrounded by Miria and the Ghosts.
Chronos wonders why Priscilla, after being freed from the Yoma cocoon, made for the awakened beings in the hills, and not Raki and the Ghosts. He guesses that Raki's presence is what prevented an attack. And that Raki's silence indicates a previous relation with Priscilla.[104]
Miria's plan[]
After Miria reveals her scheme to defeat Priscilla, Chronos says he will relay the plan to his comrades, but will wait for Miria to act first. He says farewell to Raki, adding that if Raki's timing is right, he could be the strongest opponent of Priscilla.
Chronos and Lars suddenly vanish.[105]
References[]
Tankōbon Claymore volumes cited are VIZ Media (en-us) editions, unless otherwise noted. Manga scenes (chapters) not yet translated cite Shueisha tankōbon (ja) editions. Manga scenes not yet published in tankōbon form cite Jump SQ (ja) editions. Fragments of Silver Omnibus (総集編 銀の断章 Gin no Danshou) 1–3, Shueisha, are only available in Japanese. Anime scenes (episodes) cited are FUNimation (en-us) editions, unless otherwise noted.
- ↑ Claymore 1, Scene 1, p. 14
- ↑ Claymore 1, Tokyopop, Scene 1, p. 14
- ↑ Claymore 1, Ediciones Glénat España, Scene 1, p. 14
- ↑ Claymore 1, Glénat Édition Française, Scene 1, p. 14
- ↑ Claymore 1, Star Comics, Scene 1, p. 14
- ↑ Claymore 1, Daewon CI, Scene 1, p. 14
- ↑ Claymore 1, Comix-ART, Scene 1, p. 14
- ↑ Claymore 1, Culturecom, Scene 1, p. 14
- ↑ Claymore 1, Ever Glory, Scene 1, p. 14
- ↑ Claymore 1, Shueisha, Scene 1, p. 14
- ↑ Fragments of Silver Omnibus 1, "Yoma War Record I," p. 507
- ↑ Claymore 15, Scene 80, p. 92
- ↑ Claymore 1, Scene 1, p. 30
- ↑ Rak is the singular form.
- ↑ Animesuki Claymore forum, 3 February 2010 [1]
- ↑ Angel Densetsu 13, Act 66, p. 40
- ↑ Claymore 15, Scene 80, p. 87
- ↑ Jump SQ 19, May 2012, Special Scene, p. 420
- ↑ Claymore 15, Scene 80, pp. 92–99
- ↑ Angel Densetsu 10, Act 28, p.41
- ↑ Claymore 7, Scene 34, p.27
- ↑ Angel Densetsu 14, Act 75, p.159
- ↑ Fragments of Silver Omnibus 1, "Yoma War Record I," p. 507
- ↑ Claymore 1, Scene 3, pp. 146–147
- ↑ Claymore, Anime Scene 4
- ↑ Claymore 6, Scene 32, pp. 141–143; Claymore, Anime Scene 12
- ↑ Fragments of Silver Omnibus 1, "Yoma War Record I," p. 507
- ↑ Claymore 1, Scene 1, p. 28; Claymore, Anime Scene 1
- ↑ Claymore 1, Scene 1, p. 42; Claymore, Anime Scene 1
- ↑ Claymore 1, Scene 3, pp. 110–111; Claymore, Anime Scene 1
- ↑ Claymore 1, Scene 3, pp. 112–119; Claymore, Anime Scene 1
- ↑ Claymore 1, Scene 3, p. 120–139; Claymore, Anime Scene 1
- ↑ Claymore 1, Scene 3, p. 142–147; Claymore, Anime Scene 1
- ↑ Claymore, Anime Scene 2
- ↑ Claymore 1, Scene 4, p. 157–164; Claymore, Anime Scene 2
- ↑ Claymore 1, Scene 4, pp. 174–183; Claymore, Anime Scene 2
- ↑ Claymore 2, Scene 5, p. 7; Claymore, Anime Scene 3
- ↑ Claymore 2, Scene 5, p. 15; Claymore, Anime Scene 3
- ↑ Claymore 2, Scene 7, p. 98; Claymore, Anime Scene 3
- ↑ Claymore 3, Scene 10, pp. 36–37; Claymore, Anime Scene 4
- ↑ Claymore 3, Scene 11, p. 57; Claymore, Anime Scene 4
- ↑ Claymore, Anime Scene 4
- ↑ Claymore 5, Scene 25, pp. 106–110; Claymore, Anime Scene 9
- ↑ Claymore 5, Scene 25, pp. 123–126; Claymore, Anime Scene 9
- ↑ Claymore 6, Scene 31, pp. 126–127; Claymore, Anime Scene 12
- ↑ Claymore 6, Scene 32, p. 140; Claymore, Anime Scene 12
- ↑ Claymore 6, Scene 32, pp. 141–143; Claymore, Anime Scene 12
- ↑ Claymore 6, Scene 32, p. 157; Claymore, Anime Scene 12
- ↑ Claymore 6, Scene 33, p. 178; Claymore, Anime Scene 12
- ↑ Claymore 6, Scene 33, p. 189; Claymore, Anime Scene 12
- ↑ Claymore 7, Scene 34, pp. 25–26; Claymore, Anime Scene 12
- ↑ Claymore 7, Scene 34, p. 28; Claymore, Anime Scene 12
- ↑ Claymore 7, Scene 34, p. 29; Claymore, Anime Scene 12
- ↑ Claymore 10, Scene 55, p. 123
- ↑ Claymore 10, Scene 55, pp. 125–127
- ↑ Claymore 10, Scene 55, pp. 128–131
- ↑ Claymore 10, Scene 56, p. 135
- ↑ Claymore 11, Scene 61, pp. 109–125
- ↑ Claymore 11, Scene 62, p. 159
- ↑ Claymore, Anime Scene 19
- ↑ Claymore, Anime Scene 19
- ↑ Claymore, Anime Scene 20
- ↑ Claymore, Anime Scene 21
- ↑ Claymore, Anime Scene 22
- ↑ Claymore, Anime Scene 24
- ↑ Claymore, Anime Scene 25
- ↑ Claymore, Anime Scene 26
- ↑ Claymore 15, Scene 81, p. 115
- ↑ Claymore 15, Scene 81, p. 117
- ↑ Claymore 16, Scene 89, pp. 184–185
- ↑ Claymore 17, Scene 92, p. 95
- ↑ Claymore 17, Scene 94, pp. 156–157
- ↑ Claymore 20, Scene 110, pp. 71–75
- ↑ Claymore 18, Scene 96, pp. 13–16
- ↑ Claymore 20, Scene 110, pp. 77–78
- ↑ Claymore 20, Scene 110, pp. 85–87
- ↑ Claymore 21, Scene 114, pp. 36–37
- ↑ Claymore 21, Scene 115, pp. 41–43
- ↑ Claymore 21, Scene 115, pp. 46–49
- ↑ Claymore 21, Scene 115, p. 57
- ↑ Claymore 21, Scene 118, p. 145
- ↑ Jump SQ, March 2012, Claymore, Scene 123, p. 625
- ↑ Jump SQ, May 2012, Claymore, Scene 125, p. 701
- ↑ Jump SQ, May 2012, Claymore, Scene 125, pp. 704–705
- ↑ Claymore 19, Scene 104–Scene 105, pp. 93–125
- ↑ Jump SQ, July 2012, Claymore, Scene 127, p. 273
- ↑ Jump SQ, July 2012, Claymore, Scene 127, pp. 274–276
- ↑ Jump SQ, July 2012, Claymore, Scene 127, pp. 277–279
- ↑ Jump SQ, July 2012, Claymore, Scene 127, pp. 284–285
- ↑ Jump SQ, July 2012, Claymore, Scene 127, p. 285
- ↑ Jump SQ, August 2012, Claymore, Scene 128, pp. 322–323
- ↑ Jump SQ, August 2012, Claymore, Scene 128, pp. 325–326
- ↑ Jump SQ, August 2012, Claymore, Scene 128, pp. 326–329
- ↑ Jump SQ, September 2012, Claymore, Scene 129, pp. 634–637
- ↑ Jump SQ, September 2012, Claymore, Scene 129, pp. 640–644
- ↑ Jump SQ, September 2012, Claymore, Scene 129, pp. 645–646
- ↑ Jump SQ, September 2012, Claymore, Scene 129, pp. 647–650
- ↑ Jump SQ, September 2012, Claymore, Scene 129, pp. 651–655
- ↑ Jump SQ, September 2012, Claymore, Scene 129, pp. 658–659
- ↑ Jump SQ, November 2012, Claymore, Scene 131, pp. 396–397
- ↑ Jump SQ, December 2012, Claymore, Scene 132, pp. 238–239
- ↑ Jump SQ, December 2012, Claymore, Scene 132, pp. 240–241
- ↑ Jump SQ, December 2012, Claymore, Scene 132, pp. 242–243
- ↑ Jump SQ, December 2012, Claymore, Scene 132, pp. 244–245
- ↑ Jump SQ, December 2012, Claymore, Scene 132, pp. 251–255