| Yuma | |
|---|---|
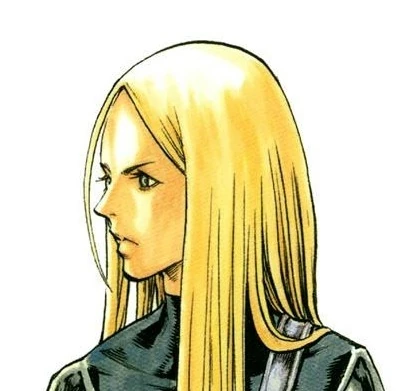 Yuma, tankōbon 18 front fold
| |
|
VIZ Media name |
Yuma[1] |
|
Variant |
Uma[2][3] (de |
|
Original name |
ユマ[12] Uma |
|
Rank No. |
40 of the Current Generation[13] |
|
Current status |
Manga: survives the Battle of the North, deserts Organization, 7-year timeskip |
|
Ties |
Organization, Ghosts, Holy City of Rabona |
|
Class |
Defensive:[14] unknown ability |
|
Technique |
Thrown sword |
|
Quote |
It felt like her sword wasn't even moving.[15] |
|
Anime voice |
Cherami Leigh (en-us) |
|
First appearance |
|

Etymology[]
Origins[]
From the Sanskrit उमा (flax), suggestive of character's hair color. One of over a thousand names for the Hindu goddess, Parvati. The original VIZ Media spelling, "Uma," is a common first name in India, and increasingly common in the West.
ユマ is "Uma" as in ユマサーマン[16] ![]() (Uma Thurman).
(Uma Thurman).
Uma versus Yuma[]
Owing to a similar spelling and pronouciation, ユマ often confused with ウマ ![]() (yuma), Japanese for "pony." Or "Yuma," the county and town in Arizona, named after the North American Indian people—the Yuman—itself derived from "Yahnuiyo," meaning "son of the captain."
(yuma), Japanese for "pony." Or "Yuma," the county and town in Arizona, named after the North American Indian people—the Yuman—itself derived from "Yahnuiyo," meaning "son of the captain."
The American "Yuma" is pronounced U-ma. The Hindi feminine first name "Uma" is pronounced OO-muh, as in the FUNimation anime.
Yuma now official[]
VIZ Media uses "Uma" between Scene 51[17] and Scene 98,[18] then switches to "Yuma" in Scene 105.[19] "Yuma" in continued use as of Scene 112.[20]
Appearance[]
Claymore warrior[]
Physical[]
In her first appearance, her back turned, wearing her characteristic ponytail.[21]
Uniform[]
A butterfly-shaped buckle holds 2-layer spaulders on the shoulders. The faulds skirt has horizontally overlapped bands on the hips.
Ghost[]
After 7-year timeskip, she wears her hair loose.
During the timeskip, she replaces her Organization uniform. But instead of "Zettai Ryouiki" look—light armor worn over sleeved top, gaped stockings and short skirt—Yuma wears a "catsuit". Her only armor are spaulders on her shoulders.
Closest to Helen in dress. Later in Scene 129, before engaging Cassandra, Yuma reverts to her old uniform.[22]
Personality[]
Originally a low ranking double-digit, Yuma is fearful and hesitant in combat. Possibly one of braver warriors, since she has the most to overcome.
In Chaldean Numerology, the number 40—Yuma's number—reduces to 4, the sign of youth. A "4" is fated to have an immature and sometime insecure personality. Compare to Tabitha.
Datasheet[]
Class[]
Yuma is a defensive type.[23] Having no Organization datasheet in the "Yoma War Record," her ability and baselines are unknown. Initially appears to have a low Yoma power baseline.
Technique[]
Yuma's iconic technique is the "thrown sword."[24] Possibly alluding to the Chakram—a thrown, bladed ring used by the Hindu goddess Uma as a weapon.
History[]
Childhood[]
Born in Sutafu near Organization Headquarters[25]
Organization[]
Battle of the North[]
Member of the battle group in Pieta during the Battle of the North. Assigned to Team Miria: Queenie (No. 20) and Tabitha (No. 3).[26]
Engagement I[]
During the first engagement with the three scouts, Team Miria fights the Dreadlock awakened. Yuma loses her arm.[27]

Uma being carried by Tabitha

Engagement II[]
Manga and anime diverge here.
Manga[]
Yuma appears in her own flashback, while she follows Clare in Alfons. In the banquet hall of the Eastern Inn, Miria holds a meeting with the battle group. She tells everyone to take a half dose of suppressant. If rendered unconscious during combat, a warrior will radiate no aura, making her appear dead to both the Northern Army and Organization.[28]
Before the second engagement, Yuma appears in Scene 56. After second engagement of Pieta, seven warriors survive—Miria, Cynthia, Deneve, Helen, Tabitha, Yuma and Clare.[29]
Anime[]
Mentioned by Flora before engagement. The Northern Army invades Pieta. After losing three members, versus five Claymore warriors, the Northern Army retreats. Rigaldo sequence similar to manga.[30]
Yuma may be among the survivors during the inn lobby scene.[31]
7-year timeskip[]
Alfons[]
Yuma is one of seven Ghosts who desert the Organization. Hiding in mountains, they train with Yoma powerless techniques. Miria serves as captain.[32]
Despite risking exposure to the Organization, the Ghosts rescue the Dabi hunt.[33]
Meanwhile, Yuma accompanies Clare to a deserted village. There, Clare finds evidence that Raki may still be alive. Back at the cavern hideout, she announces her intent to go south. Miria tests Clare's fighting ability. Satisfied, Miria says she will accompany Clare. But everyone decides to go en masse.[34]
Toulouse[]
Agatha[]
The Ghosts find Rabona under siege by Agatha.[35] After Agatha's death, Miria relates her research on Organization—Miria's theory.[36]
Left behind[]
Miria tells everyone to take care of personal business before the last fight with the Organization. Clare travels west to Lautrec—with Cynthia and Yuma—to find Raki. Helen goes south to Mucha with Deneve.
Miria will wait in Rabona for everyone's return. But she adds one caveat: "When the time comes, I'll go forward alone if I must,"[37] foreshadowing the events of Scene 106.
Lautrec[]
Lacroix[]
In Lacroix, Cynthia and Clare fight awakened, while Yuma knocks unconscious Organization search party.[38] Yuma uses her thrown sword to immobilized the awakened's wings, enabling the final kill. But Rubel witnesses everything. Later in a private meeting under a gateway arch, Cynthia realizes that Rubel is a mole for the Dragons' allies.[39]
Rubel plays on their sympathies by claiming that Rafaela and Renée are being held captive by Riful. Clare suspects that Rubel is only trying to get them killed.[40]
Baited by Rubel, the warriors search for Renée and Rafaela. They run into Dauf, who grabs Yuma's leg, which Clare cuts off. While Cynthia regenerates Yuma's leg, Clare follows Dauf into Witch's Maw II.[41]
Destroyer[]
When the Destroyer awakens, Yuma flees carrying Cynthia, now too weak to flee on her own. They run into Beth, merging with a parasitic rod.[42]
Later, Yuma again flees carrying Cynthia, now without her lower torso, lost to the awakened Beth.[43]
Still later, when Hellcats threaten them, Yuma leaves Cynthia behind, Cynthia's body now regenerated. Yuma lures Hellcats away from Cynthia. But Dietrich brings Abyss Feeders and rescues Yuma.[44]
As Yuma holds up Cynthia, they witness the Destroyer consume a forest.[45]
Return to Holy City[]
Ghosts repel an invasion of awakened and Yoma sent by the Organization in reprisal for Miria's attack.[46] Later on Helen's insistence, the Ghosts bring the Yoma cocoon from Lautrec to Rabona.[47]
Sutafu[]
Rescuing hunt[]
Yuma accompanies Ghosts to rescue Miria. During rescue of Anastasia's hunt, Yuma uses a thrown sword on a rampaging awakened, while Cynthia heals Phina.[48]
Miria[]
Later at Organization Headquarters, they find Miria fighting an awakened Hysteria. Anastasia yanks Miria back to earth.[49]
Cynthia calms Miria's runaway Yoma power, while Yuma regenerate Miria's injuries. Deneve and the Ghosts decide to rescue the two warriors impaled on Hysteria's limbs.[50]
After Miria recovers, Yuma joins her comrades in charging Anstasia's hair cord with Yoma energy.
End of Organization[]
After the deaths of Hysteria and Roxanne, Miria, Deneve and Helen invade the Executive facility.
Meanwhile, Yuma regenerates Audrey's limbs on the battlefield. Audrey is made whole. Soon Miria announces the death of Limt.[51]
Return of Clare[]
The Ghosts sail back to Rabona. Clare is freed from the cocoon,[52] as well as the Destroyer and Priscilla, whose combat engulfs an awakened audience.[53]
Two female awakened are hurled into the city. They awakened into huge tapeworm- and origami-like forms.[54]
Miata then Clarice attack the Origami awakened. Clarice is thrown back, but is rescued by Cynthia and Yuma.[55]
Cassandra[]
Miria, Deneve, Helen and Clare fight the awakened Cassandra. Elsewhere in the hills, Cynthia, Tabitha and Yuma collectively synchronize their Yoma power with Cassandra, a technique that has parallels with Yoma Energy Alignment and Control and Yoma power harmonization. The goal is breaking the spell that Priscilla has over Cassandra's mind. And preventing the two from merging.[56]
They fail to synchronize with Cassandra. But despite this crisis, they become even more concerned about the mysterious, yet familiar aura that Helen noticed earlier.[57]
References[]
Tankōbon Claymore volumes cited are VIZ Media (en-us) editions, unless otherwise noted. Manga scenes (chapters) not yet translated cite Shueisha tankōbon (ja) editions. Manga scenes not yet published in tankōbon form cite Jump SQ (ja) editions. Fragments of Silver Omnibus (総集編 銀の断章 Gin no Danshou) 1–3, Shueisha, are only available in Japanese. Anime scenes (episodes) cited are FUNimation (en-us) editions, unless otherwise noted.
- ↑ Claymore 19, Scene 105, p. 111
- ↑ Claymore 9, Scene 51, p. 173
- ↑ Claymore 9 Scene 51, p. 78
- ↑ Claymore 19, Scene 105, p. 111
- ↑ Claymore 9, Ediciones Glénat España, Scene 51, p. 173
- ↑ Claymore 9, Glénat Édition Française, Scene 51, p. 173
- ↑ Claymore 9, Star Comics, Scene 51, p. 169
- ↑ Claymore 9, Daewon CI, Scene 51, p. 173
- ↑ Claymore 9, Comix-ART, Scene 51, p. 173
- ↑ Claymore 9, Culturecom, Scene 51, p. 173
- ↑ Claymore 9, Ever Glory, Scene 51, p. 173
- ↑ Claymore 9, Shueisha, Scene 51, p. 173
- ↑ Fragments of Silver Omnibus 3, "Yoma War Record III," p. 730
- ↑ Fragments of Silver Omnibus 3, "Yoma War Record III," p. 730
- ↑ Claymore 15, Scene 83, p. 186
- ↑ Uma Thurman in Wikipedia
- ↑ Claymore 9 Scene 51, p. 78
- ↑ Claymore 18 Scene 98, p. 78
- ↑ Claymore 19, Scene 105, p. 111
- ↑ Claymore 20 Scene 112, p. 147
- ↑ Claymore 9, Scene 50, p. 145; Claymore, Anime Scene 18
- ↑ Jump SQ, September 2012, Claymore, Scene 129, pp. 629–631
- ↑ Fragments of Silver Omnibus 3, "Yoma War Record III," p. 730
- ↑ Claymore 15, Scene 83, p. 91
- ↑ Claymore 15, Scene 82, p. 155
- ↑ Claymore 9, Scene 51, p. 173; Claymore, Anime Scene 18
- ↑ Claymore 10, Scene 54, p. 89; Claymore, Anime Scene 19
- ↑ Claymore 12, Scene 66, pp. 83–87
- ↑ Claymore 12, Scene 66, pp. 93–94
- ↑ Claymore, Anime Scene 21
- ↑ Claymore, Anime Scene 24
- ↑ Claymore 12, Scene 67, p. 121
- ↑ Claymore 12, Scene 65, p. 74
- ↑ Claymore 12, Scene 67, pp. 132–133
- ↑ Claymore 14, Scene 77, pp. 125
- ↑ Claymore 15, Scene 79–Scene 80, pp. 52–76
- ↑ Claymore 15, Scene 82, p. 154
- ↑ Claymore 15, Scene 83, pp. 181–193
- ↑ Claymore 16, Scene 84, p. 32
- ↑ Claymore 16, Scene 84, p. 37
- ↑ Claymore 17, Scene 90, pp. 20–37
- ↑ Claymore 18, Scene 96, p. 20
- ↑ Claymore 18, Scene 98, p. 71
- ↑ Claymore 18, Scene 101, pp. 189–191
- ↑ Claymore 19, Scene 105, p. 110
- ↑ Claymore 20, Scene 108, pp. 21–24
- ↑ Claymore 20, Scene 109, p. 44
- ↑ Claymore 20, Scene 112, pp. 142–143
- ↑ Jump SQ, January 2012, Claymore, Scene 121, p. 205
- ↑ Jump SQ, February 2012, Claymore, Scene 122, p. 620
- ↑ Jump SQ, June 2012, Claymore, Scene 126, p. 258–261
- ↑ Jump SQ, October 2012, Claymore, Scene 130, p. 409
- ↑ Jump SQ, October 2012, Claymore, Scene 130, pp. 410–411
- ↑ Jump SQ, November 2012, Claymore, Scene 131, pp. 367–369
- ↑ Jump SQ, November 2012, Claymore, Scene 131, pp. 373–375
- ↑ Jump SQ, January 2013, Claymore, Scene 133, pp. 771–772
- ↑ Jump SQ, January 2013, Claymore, Scene 133, p. 775